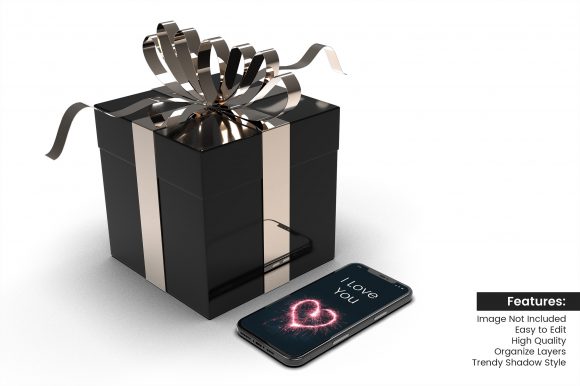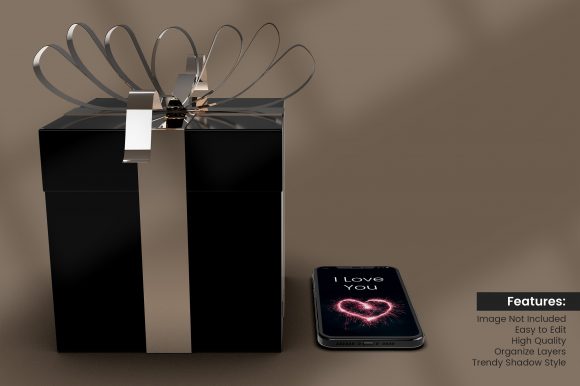
3D Black Realistic Gift Box Mockup: A Practical Tool for Visual Packaging Design
When you're preparing a product launch, updating your brand portfolio, or crafting visuals for a seasonal campaign, the way you present your packaging can make or break first impressions. A 3D black realistic gift box mockup gives you a clean, professional foundation for showing off a design without the cost, time, or mess of physical prototyping. It fits into a broader workflow as a bridge between your digital design file and the final printed piece. Instead of waiting for a sample box to arrive, you can produce client-ready visuals, social media teasers, and catalog images in a fraction of the time.
Using a mockup like this is not about hiding flaws or faking reality. It is about simulating real-world lighting, texture, and depth so you and your stakeholders can evaluate how a design will read on an actual box. The black background and realistic shading force you to pay attention to contrast, logo placement, and color balance. If a design looks flat or muddy on a dark surface, it will likely need adjustment before production. This makes the mockup a diagnostic tool, not just a presentation aid.
Where This Mockup Belongs in Your Workflow
A 3D black realistic gift box mockup works well at multiple points in a project. You can use it early in the creative process to test layout variations, try different finishes, or compare foil stamping vs. matte print options. Later, it serves as a polished visual for client approvals or internal sign-offs. After the project is complete, the same mockup file can be repurposed for marketing materials, lookbooks, or e-commerce listings.
One common mistake is treating mockups as a final step. In reality, the earlier you apply a realistic render to your design, the sooner you catch issues with alignment, scaling, or legibility. For example, a logo that looks balanced on a flat digital canvas might appear cramped or off-center once wrapped onto a 3D box with perspective. By integrating the mockup into your review loop, you reduce the risk of costly reprints or unsatisfied clients.
This mockup also interacts well with other tools in your ecosystem. If you work in Adobe Photoshop, you can drop your artwork into a smart object layer and see it update instantly. If you use Canva or Affinity, you can still apply the same file with minor adjustments. The key is to keep your source artwork organized and layered so you can swap versions quickly. Many designers maintain a library of mockup templates, categorized by box type, color, and angle, so they can grab the right one without hunting through folders.
Practical Implementation: From File to Final Visual
Getting a polished result from a 3D black realistic gift box mockup is straightforward once you understand the preparation steps. Start with your design file at the correct resolution. Most mockups specify a recommended pixel dimension or DPI. If you drop in a low-resolution image, the final render will look soft or pixelated, defeating the purpose of realism. Use 300 DPI for print-oriented mockups and at least 150 DPI for web use.
Next, pay attention to the file format. A PSD file with smart objects is the most common and flexible option. You open the smart object, paste your artwork, save, and the mockup updates automatically. This non-destructive workflow means you can experiment with ten different colorways or logo placements without ever flattening the original file. If you are working with a team, this becomes even more valuable because every revision lives in a single template.
Lighting and shadows are already built into a good mockup, so you rarely need to tweak them. However, you should check that your design aligns with the box surface correctly. Some mockups include guides or layer masks to show you the fold lines and edges. If your design bleeds over a fold, it might look unnatural in the final render. Use these guides as boundary markers and keep critical elements like text and logos inside the safe zone.
Usability and Organization for Long-Term Use
Over time, a well-organized mockup library saves you hours of repetitive work. Instead of re-downloading or recreating a 3D black realistic gift box mockup for every project, you keep a master file and duplicate it as needed. Name your files with consistent conventions such as “GiftBox_Black_RightAngle_300DPI.psd” so you can search and sort quickly. Store them in a cloud folder shared with your team or clients if collaboration is frequent.
Compatibility is another factor that affects long-term usability. Most PSD-based mockups work across Photoshop versions, but if you use alternative software, check that the smart object layer structure is supported. Some mockups also come in PNG or JPEG formats with pre-placed shadows, which trade flexibility for simplicity. If you do not need to swap designs often, a static image with a clipping mask might be sufficient. For iterative work, the smart object approach is better.
Efficiency also depends on how you batch your outputs. If you need to present a gift box from multiple angles—front, side, and slightly open—using separate mockup files for each angle lets you generate a cohesive set. You can even create a template document that holds all three angles on one canvas, so you export a single image for social media or print catalogs. This kind of preparation reduces the time between finalizing a design and publishing it.
Quality Control and Consistency Across Projects
One of the overlooked benefits of a 3D black realistic gift box mockup is how it enforces consistency. When you use the same lighting setup, shadow depth, and background across all your product visuals, your brand looks more cohesive. A customer scrolling through your website or flipping through a brochure will see a uniform presentation style, which builds trust and recognition.
Quality control becomes easier because you can compare designs side by side in the same mockup. For example, if you are launching a holiday collection with three different box sizes, placing all three renders on one page lets you check that the logos scale proportionally and the colors match. Any discrepancy stands out immediately. This is much harder to catch when each design is mocked up in a different environment or by a different person on the team.
Another quality consideration is file resolution for different outputs. A mockup intended for a high-end print catalog needs more detail than one for Instagram Stories. Keep separate exports or adjust your mockup's document size accordingly. If your mockup allows, you can scale the smart object content to match, but avoid upscaling beyond 120% or the sharpness degrades. Test a small area first before committing to the final export.
Real-World Workflow Examples
Consider a small business owner who produces artisanal candles. They have five fragrance variants, each with a different label color. Using a 3D black realistic gift box mockup, they can drop each label design into the smart object and preview how the gold foil text reads against the black box. They notice that one label's script font blends into the dark background, so they adjust the stroke or choose a lighter metallic finish. Without the mockup, they might not catch this until the first print run, wasting both money and time.
In a marketing agency context, a project manager might collect mockups from two designers and present them to the client in a single document. The client sees the gift box from multiple angles and can comment on specific details like ribbon placement or side-panel text. The mockup becomes a communication tool that reduces back-and-forth email chains. Because the visuals are realistic, the client is less likely to ask for unnecessary changes based on an abstract flat layout.
For a freelancer creating product photography on a budget, the mockup replaces the need for a physical photo studio. Instead of purchasing boxes, printing samples, and setting up lights, they generate photorealistic renders in minutes. They can even overlay their render onto a lifestyle background image, creating a composite that looks like a professional photoshoot. This approach saves both money and production lead time, allowing them to take on more clients or projects.
Long-Term Integration and Future-Proofing
As your workflow evolves, the role of a 3D black realistic gift box mockup can expand. If you start creating video content for social media, you can use the same mockup to generate a static thumbnail or a short animation by layering the render over a moving background. Some mockup files now include separate layers for flaps, ribbons, or inserts, which you can toggle on and off to create variations without starting from scratch.
Keep an eye on software updates as well. New versions of Photoshop and Affinity often improve smart object behavior or add 3D capabilities. Your existing mockup library will likely remain compatible, but you may gain new options like real-time lighting previews or faster rendering. Test one file after each major update to confirm nothing breaks. If a mockup uses a deprecated effect layer, you can usually reapply it with minimal effort.
Finally, document your mockup process. Write down which files you use for specific box sizes, which layer names correspond to artwork areas, and any custom adjustments you made to lighting or shadows. This documentation helps you onboard team members or revisit a project months later without re-learning the setup. It also serves as a reference when you decide to create your own mockup from scratch, which many experienced designers eventually do.
A 3D black realistic gift box mockup is not a one-time asset. It is a reusable component of your design toolkit that supports planning, execution, review, and publication. When used deliberately, it improves the quality of your visual output, streamlines your collaboration with clients and colleagues, and protects your budget from costly printing errors. By integrating it early and organizing it well, you turn a simple template into a long-term productivity asset.