Blue Bubble 3D Editable Text Effect: What to Know Before You Dive In
If you have spent any time browsing design resources, you have likely come across the Blue Bubble 3D Editable Text Effect. It is one of those striking visual styles that immediately grabs attention — glossy, dimensional, and polished. Whether you are a freelancer working on a social media campaign, a small business owner updating a website banner, or a hobbyist experimenting with typography, this effect can elevate your text from flat to memorable. But there is more to using it well than simply applying a preset and calling it done. Many people pick up a file or a tutorial, rush through the process, and end up with results that look anything but professional. Let us walk through what this effect really involves, where people commonly go wrong, and how you can avoid those pitfalls.
What Exactly Is the Blue Bubble 3D Editable Text Effect?
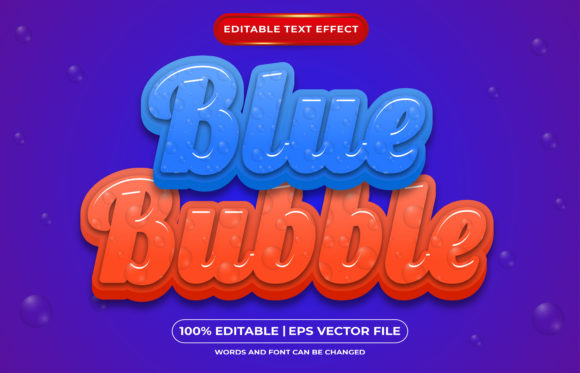
At its core, this is a layered text style that simulates a glossy, rounded, three-dimensional bubble appearance using shades of blue. It is typically created in graphic design software like Adobe Photoshop or Illustrator, often using layer styles, gradients, bevel and emboss effects, and drop shadows. The “editable” part means that you can replace the placeholder text with your own words while retaining all the styling — no need to rebuild the effect from scratch. That convenience is a big reason why designers love it. You get a high-impact look with minimal effort, provided you understand how to handle the file correctly.
The appeal is obvious. Blue tones convey trust, calm, and clarity, which makes this effect popular for tech brands, educational content, and even event graphics. But the real magic is in the depth and light simulation that makes the text look like it could float off the page.
Common Mistakes That Undermine the Effect
Even with a ready-made style, there are several ways the final result can fall short. These mistakes often come from misunderstanding how the effect works or overlooking key details in the setup.
Mistake Number One: Ignoring the Font Choice
One of the most frequent errors is swapping the original text with a completely different font and expecting the effect to adapt perfectly. The Blue Bubble 3D Editable Text Effect is often designed around a specific font weight and shape. A thin, condensed font will not hold the bubble contours the same way a bold, rounded font will. The highlights and shadows rely on there being enough surface area to reflect light. Choose a font that is too narrow, and the bubble effect looks squashed. Choose one with sharp serifs, and the smooth, rounded illusion breaks.
What to do instead: Use a font that is similar in weight and roundness to the original. If the effect was built on a bold sans-serif, stick with that family. Avoid overly decorative or ultra-thin typefaces. Test a few options before committing.
Mistake Number Two: Overlooking Layer Style Dependencies
Editable text effects rely on layer styles that depend on the position of the text within the canvas. If you move the text, change the canvas size, or resize the text layer significantly, the gradients, bevels, and shadows can shift or distort. The bubble may no longer appear centered or properly lit. This is especially common when someone opens a template, drags the text to a new spot, and wonders why the effect looks off.
Better approach: Before you edit, check whether the effect uses global lighting or specific angle settings. Keep the text roughly where it was intended to be, or adjust the layer style angles to match the new position. If you resize text, use proportional scaling to maintain the relationship between the effect and the letterforms.
Mistake Number Three: Forgetting About Background Contrast
The glossy highlights and deep shadows in a blue bubble effect are designed to pop against a particular type of background. Many people apply the text over a busy image or a color that clashes with the blue tones. The result is that the bubble edges blend into the background, or the highlights look muddy. The three-dimensional illusion depends on contrast. If the background is too dark, the shadows disappear. If it is too bright, the highlights wash out.
Practical advice: Use the effect against a solid, neutral background or a subtle gradient that complements the blue palette. Dark backgrounds often work well because they allow the lighter highlights to shine. Test your background choice before finalizing the design. A simple adjustment here can transform the effect from flat to fantastic.
Misunderstandings About Editable Text Effects
Beyond specific mistakes, there are broader misunderstandings that can affect your satisfaction and results.
“It Will Work Perfectly in Any Software”
A common assumption is that a file labeled “editable text effect” will work identically across all design programs. In reality, the Blue Bubble 3D Editable Text Effect is often built using native features of a specific application, like Photoshop layer styles or Illustrator appearance panels. If you try to open a PSD file in a different tool, the effects may not transfer or may render differently. The editable promise only holds true if you use the intended software version.
Check before you commit: Read the product description carefully. If you are buying a template, confirm the file format and required software version. If you are following a tutorial, make sure you have the same tools available. This one check will save you hours of frustration.
“It’s Just a One-Click Solution”
While editable text effects are designed to save time, they are not entirely automatic. You still need to manage the text content, adjust spacing, and sometimes tweak the layer style settings if your text length differs significantly from the original. A short word like “SALE” and a longer phrase like “Summer Collection” may need different kerning or font size to maintain the bubble proportions.
Better mindset: Treat the effect as a powerful starting point, not a finished product. Plan your text length, and be ready to make small adjustments. The effort is minimal, but it makes a noticeable difference.
What to Check Before You Buy or Download
If you are considering purchasing a Blue Bubble 3D Editable Text Effect template or resource, there are several factors worth verifying to ensure you get what you expect.
- File format and software version: Confirm whether the file is a PSD, AI, EPS, or other format, and whether it supports your version of the software. Some older templates may not work with the latest releases.
- Font requirements: Check if the font used in the preview is included or if you need to supply your own. Many templates use commercial fonts that you may need to purchase separately.
- Customization instructions: Look for a readme file or documentation. Quality resources include steps for editing text and adjusting settings. If the product lacks basic guidance, consider whether you have the experience to figure it out.
- Preview images: Examine the previews closely. Are the effects shown on different backgrounds? Do they include examples with both short and long text? This tells you how flexible the effect really is.
- Licensing terms: Especially if you are a professional or business owner, check the license for commercial use. Some templates restrict use in merchandise, logos, or large-scale print runs.
Practical Advice for Getting the Best Results
Once you have a quality resource and understand the common pitfalls, you can produce impressive work with relatively little effort. Here are some additional tips that experienced users often apply.
- Test on a copy of the file first. Always work on a duplicate so you can revert to the original if something goes wrong.
- Use a simple background to start. Solid dark blue, charcoal, or white backgrounds help you see exactly how the bubble effect behaves before you move it into a more complex composition.
- Mind your text case. All caps often work best for bubble effects because uppercase letters have a more uniform height and shape. Mixed case can work, but test it to be sure.
- Consider the viewing distance. If the text will appear on a billboard or large banner, the bubble effect will read differently than on a phone screen. Scale and contrast matter more at a distance.
- Combine with subtle lighting effects. A faint glow or reflection underneath the text can enhance the 3D illusion. Just keep it subtle so it does not compete with the bubbles.
How These Details Affect Your Final Outcome
When you pay attention to font choice, background contrast, proper scaling, and software compatibility, the Blue Bubble 3D Editable Text Effect becomes a reliable tool in your design arsenal. The difference between a careless application and a thoughtful one is immediately visible. Poor text placement, mismatched fonts, or a clashing background can make the effect look dated or amateur. On the other hand, when you handle the details correctly, the same effect can make your content look polished, contemporary, and engaging. That impact matters whether you are building a brand, promoting a product, or simply sharing something creative.
For entrepreneurs and small business owners, this effect can be a cost-effective way to produce professional-looking graphics without hiring a designer. For educators and bloggers, it adds visual interest to titles and headers. For freelancers, it becomes a repeatable asset you can offer to clients. The key is knowing what the effect can and cannot do, and respecting the small steps that separate good from great.
Final Thoughts on Using Blue Bubble 3D Editable Text Effect Smartly
There is a reason this style has remained popular across so many projects. It is versatile, visually appealing, and accessible to anyone willing to learn its nuances. By avoiding the common mistakes — like ignoring font weight, disregarding background contrast, or assuming perfect cross-software compatibility — you set yourself up for success every time. Whether you are a beginner exploring text effects for the first time or a seasoned professional adding to your toolkit, the Blue Bubble 3D Editable Text Effect can deliver exactly the look you want. Just take a moment to check the details, test your choices, and adjust as needed. That small investment of attention will reward you with results that truly stand out.